
5 Things to Check Before Your WoF and Save Yourself Time and Money
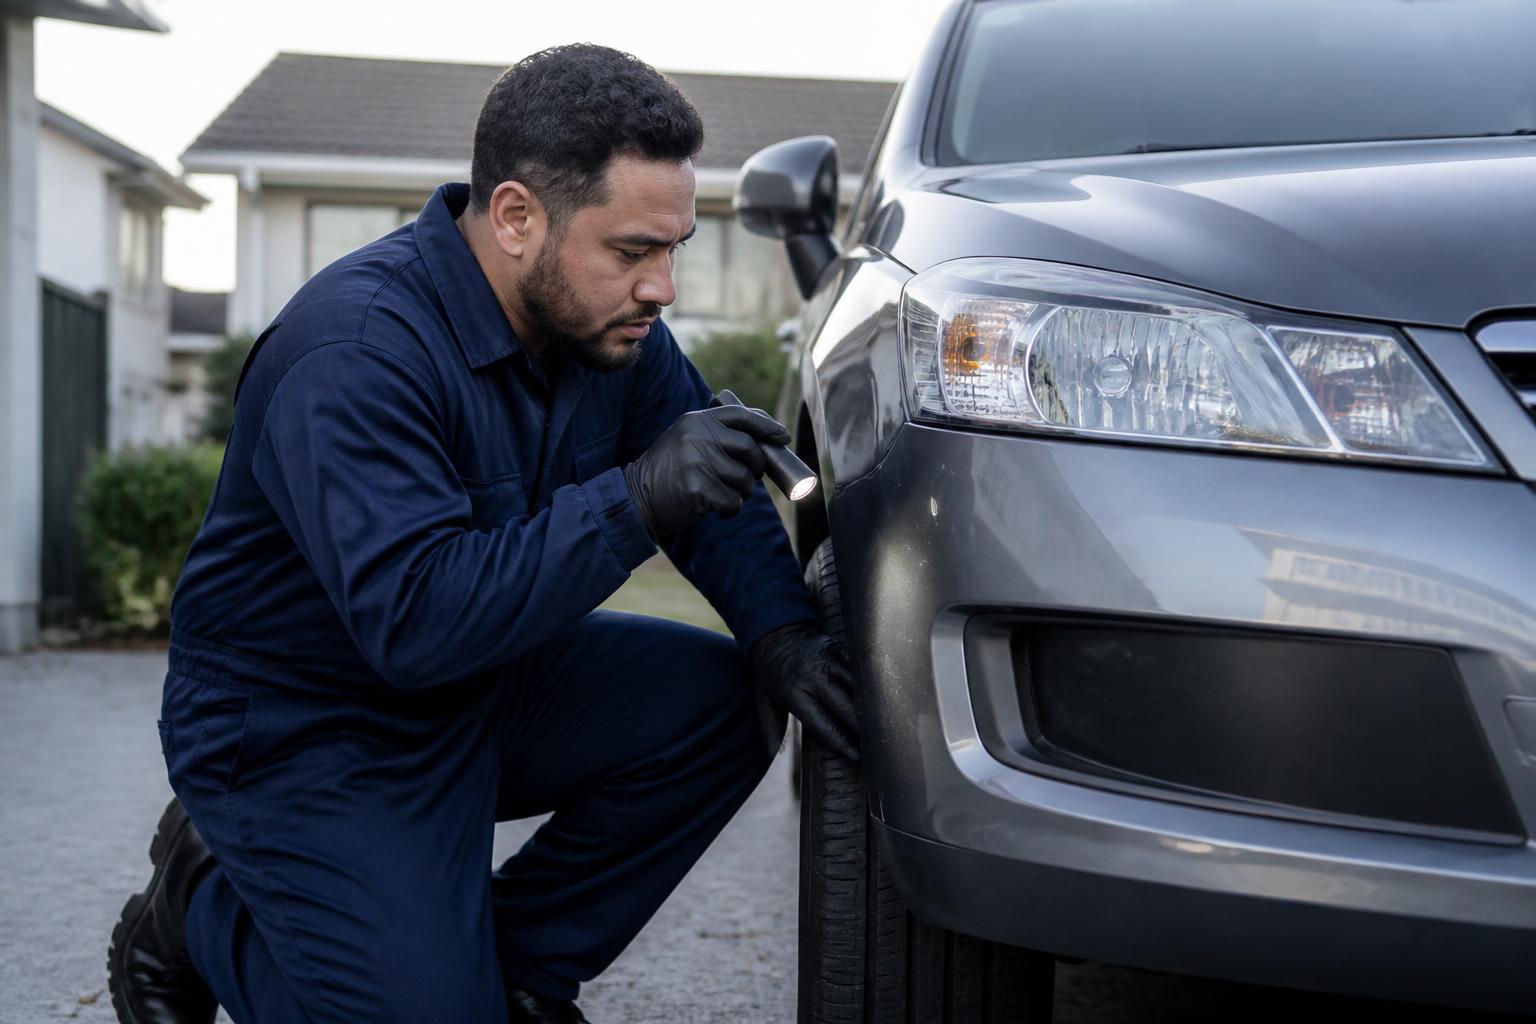
A Warrant of Fitness inspection can feel like a test you are simply hoping your vehicle will pass. You drop the car off, wait for the call and wonder whether the result will be a new WoF label or a list of repairs you were not expecting.
Although some WoF failures involve faults that need professional diagnosis or repair, others are caused by relatively simple problems that a driver could spot before arriving at the inspection station. A blown brake-light bulb, worn wiper blade or damaged tyre may be easy to overlook during everyday driving, but each can affect your vehicle's safety and its ability to pass inspection.
A WoF is a regular safety inspection confirming that a vehicle meets New Zealand's required safety standards at the time it is inspected. However, passing a WoF does not mean the vehicle will remain safe until the next inspection. Vehicle owners are responsible for keeping their vehicles in a roadworthy condition at all times — not only on the day of the WoF.
Before taking your vehicle for its next inspection, work through these five areas. A few simple checks may help you identify a problem early, avoid unnecessary inconvenience and make your WoF appointment much less stressful.
1. Check All of Your Vehicle's Lights
Vehicle lights are essential for seeing the road and communicating with other drivers. They help other road users recognise when you are braking, turning, reversing or travelling in poor visibility.
Because drivers usually operate their vehicle from inside the cabin, it is surprisingly easy to go for weeks without noticing that an exterior bulb has stopped working.
Before your WoF, check:
- Low-beam headlights
- High-beam headlights
- Front and rear indicators
- Hazard lights
- Brake lights
- Tail lights
- Reverse lights
- Number-plate lights
- Fog lights, where fitted
The easiest way to do this is with another person. Sit in the driver's seat and operate each light while they walk around the vehicle.
When checking the brake lights, make sure all fitted brake lamps illuminate, including the high-mounted brake light commonly positioned in the rear window or boot area.
When checking the indicators, confirm that each one flashes at a normal, consistent speed. An indicator flashing unusually quickly can be a sign that one of the bulbs is not working correctly.
You can also check many lights by parking near a wall, garage door or reflective shop window. The reflection may allow you to see whether the headlights, brake lights and indicators are operating.
Look beyond the bulb itself
A light may illuminate but still have another issue. Examine the lenses for:
- Cracks or significant damage
- Water or condensation inside the fitting
- Loose housings
- Discolouration
- Cloudy headlight lenses
- Missing sections of the lens
Cloudy or yellowed headlights can reduce the amount of light reaching the road, particularly during wet Auckland evenings. Restoration may improve moderately cloudy lenses, while badly damaged lights may need replacement.
Do not assume that a dashboard warning will always tell you when a bulb has failed. Some modern vehicles have bulb-monitoring systems, but many vehicles do not.
Checking your lights only takes a few minutes and may prevent a straightforward WoF failure.
2. Inspect Your Tyres Carefully
Your tyres are the only parts of your vehicle in direct contact with the road. Their condition affects braking, steering, stability and grip — especially during heavy rain.
New Zealand's minimum legal tread depth for most standard vehicle tyres is 1.5 millimetres within the relevant principal grooves and around the tyre's circumference. However, a tyre can still be unsafe or unsuitable even when some tread remains.
Check the tread across the entire tyre
Do not examine only the outside edge. Tyres can wear unevenly, and the inner edge may be significantly more worn than the part that is easy to see.
Turn the steering wheel to one side to make the front tyre tread easier to inspect. Look across the width of each tyre and check for:
- Smooth or nearly bald sections
- Uneven wear between the inside and outside edges
- Flat spots
- Exposed cords
- Cuts or splitting
- Objects embedded in the tread
Most modern tyres have moulded tread-wear indicators inside the main grooves. When the surrounding tread becomes level with these bars, the tyre is approaching or has reached its minimum allowable depth.
Even when a tyre is technically above the legal minimum, it may provide less effective grip in wet conditions as the tread becomes shallower. Do not treat 1.5 millimetres as a maintenance target. It is the minimum legal threshold.
Examine the tyre sidewalls
Check the visible sidewalls for:
- Cracks
- Bulges
- Deep cuts
- Perishing
- Exposed material
- Damage caused by kerbs or potholes
A bulge can indicate internal damage to the tyre. This is not something to monitor and ignore — it should be assessed promptly.
Check the tyre pressure
Incorrect pressure may contribute to uneven wear, reduced handling and higher fuel consumption.
The recommended pressure is usually listed:
- On a sticker inside the driver's door opening
- Inside the fuel flap
- In the vehicle owner's manual
The number printed on the tyre's sidewall is not normally the vehicle manufacturer's recommended everyday operating pressure.
Check tyre pressure while the tyres are cold, preferably before a long drive. Remember that the correct front and rear pressures may differ, particularly when the vehicle is carrying passengers, tools or a heavy load.
Uneven wear may point to another problem
Tyre wear can reveal more than the condition of the tyre itself. For example:
- Wear on both outside edges may suggest low pressure.
- Excessive wear through the centre may suggest overinflation.
- Wear on one edge may indicate an alignment issue.
- Cupped or patchy wear may be associated with suspension or wheel-balancing problems.
Simply replacing a worn tyre without addressing the cause may result in the replacement wearing out prematurely.
3. Check Your Windscreen, Wipers and Washers
Clear visibility is essential in New Zealand's changing weather conditions. A windscreen that appears acceptable on a dry afternoon may become difficult to see through when rain, glare and oncoming headlights are combined.
Start by inspecting the windscreen for:
- Cracks
- Chips
- Scratches
- Significant discolouration
- Damage in the driver's field of vision
- Stickers or objects obstructing visibility
Not every small stone chip automatically means the entire windscreen must be replaced. Its position, size and severity matter. However, chips can spread into larger cracks, especially when the glass experiences temperature changes or further impact.
Arrange an assessment early. A repairable chip may become a much more expensive windscreen replacement if it is left too long.
Test your windscreen wipers
Operate the wipers with washer fluid and watch how they move across the glass. Look for:
- Streaking
- Smearing
- Missed sections
- Juddering
- Splitting rubber
- Blades lifting away from the windscreen
- Wiper arms colliding or moving incorrectly
Wiper blades gradually harden and deteriorate due to sunlight, heat, dirt and use. Because this happens slowly, drivers often adjust to worsening visibility without realising how ineffective the blades have become.
If the wipers leave broad streaks or fail to clear the glass properly, replacing the rubber inserts or complete blades may solve the problem.
Check the windscreen washers
Confirm that the washer reservoir contains sufficient fluid and that the jets spray onto the windscreen effectively.
If the washer motor operates but little or no fluid reaches the glass, the system may have:
- Blocked washer jets
- A leaking hose
- A disconnected hose
- Frozen or contaminated fluid
- A faulty pump
Avoid pushing pins or other objects deeply into washer nozzles unless you know how the jet is constructed, as this can cause damage. A mechanic can check the system if the fault is not obvious.
While inspecting visibility, also make sure nothing hanging from the rear-view mirror or mounted to the windscreen creates an unnecessary obstruction.
4. Test Your Seatbelts and Check the Seats
Seatbelts are one of the vehicle's most important safety systems, but they are easy to overlook until an inspection identifies a problem.
Check every seating position — not only the driver's seat.
Pull each belt out and inspect it for:
- Fraying
- Cuts
- Torn edges
- Severe twisting
- Burn marks
- Chemical contamination
- Damaged stitching
- Sections that feel unusually thin or stiff
Insert the tongue into the buckle and make sure it locks securely. Press the release button and confirm that it releases normally.
Allow the belt to retract. It should return without needing to be repeatedly fed back by hand. A belt that retracts slowly may simply be twisted or dirty, but it can also indicate a problem with the retractor mechanism.
Gently pull the belt and then give it a quick, firm tug. The locking mechanism should engage under sudden movement.
Check the buckles and mounting areas
Look around the lower mounting points and buckles for:
- Loose fittings
- Missing covers
- Damage
- Heavy corrosion
- Objects obstructing the buckle
Children's toys, coins and food debris can find their way into rear-seat buckles and prevent them from locking properly.
Do not spray general-purpose oils or lubricants into a seatbelt buckle. These products can attract dirt or affect the mechanism. If a buckle is not operating correctly, it should be professionally assessed.
Make sure the seats are secure
Check that the seats feel firmly mounted and that adjustable seats lock into position. A driver's seat that moves unexpectedly during acceleration or braking can affect vehicle control.
Head restraints should also be secure and correctly fitted where required.
Seatbelt problems should never be regarded as minor. If a belt is damaged or does not lock and retract properly, arrange an inspection before carrying a passenger in that position.
5. Pay Attention to Your Brakes, Steering and Suspension
Some vehicle problems cannot be confirmed through a simple driveway inspection. However, your vehicle may already be giving you clues through changes in sound, feel or handling.
Pay close attention during normal driving before your WoF.
Warning signs from your brakes
Arrange an inspection if you notice:
- Squealing or grinding
- A scraping sound
- A soft or spongy brake pedal
- The pedal travelling further than usual
- The vehicle pulling to one side while braking
- Vibration through the pedal or steering wheel
- Reduced braking performance
- A brake warning light
- A burning smell after driving
- The handbrake or electronic parking brake not holding properly
A light squeal does not always mean the brakes are about to fail, but persistent noise should not be ignored. Grinding can indicate that a friction material has worn away and metal components are contacting each other, potentially increasing both the danger and the eventual repair cost.
If the brake pedal suddenly feels very different, braking performance is reduced or a red brake-system warning remains illuminated, avoid continuing to drive until the vehicle has been assessed.
Steering and suspension warning signs
Look out for:
- Knocking over bumps
- Clunking while turning
- Excessive bouncing
- The vehicle leaning unusually
- Wandering or pulling on a straight road
- A steering wheel that does not return normally
- Excessive looseness in the steering
- Uneven tyre wear
- Fluid around a shock absorber
- One corner of the vehicle sitting lower than the others
A suspension fault does not only affect comfort. It can influence tyre contact, steering response and braking stability.
Do not perform aggressive braking or steering tests on public roads. Simply pay attention to how the vehicle behaves during normal use and have any unusual symptoms checked professionally.
Bonus Checks Worth Doing Before Your WoF
The five areas above are a useful starting point, but a WoF inspection covers considerably more than five items. NZTA's inspection framework includes areas such as vehicle structure, lighting, vision, entry and exit, the vehicle interior, brakes, steering and suspension, tyres and wheels, the exhaust and other safety-related equipment.
Before your appointment, it is also sensible to check the following.
Look for significant rust or corrosion
Pay attention to:
- Door sills
- Floor areas
- Wheel arches
- Suspension mounting areas
- Seatbelt mounting points
- Chassis or structural areas
- Rust around the windscreen
- Sharp or loose body panels
A small patch of surface rust is different from corrosion affecting the vehicle's structural integrity. Painting over rust does not repair the underlying damage.
Sonic On-Site Solutions can help assess visible rust and advise whether it appears to be a minor treatment issue or something requiring specialist structural or panel repair.
Check the horn
The horn should operate correctly and be loud enough to provide an effective warning.
Look underneath the vehicle
Check the ground where the car is normally parked. Fresh patches of oil, coolant, brake fluid or other liquid should be investigated.
Clear water beneath the vehicle after running the air conditioning can be normal condensation. Coloured, oily or strongly scented fluid may indicate a leak.
Listen to the exhaust
An exhaust that has suddenly become louder may have a hole, broken joint or damaged component.
Also watch for:
- Exhaust components hanging unusually low
- Rattling underneath the car
- Exhaust fumes entering the cabin
- Excessive visible smoke
Exhaust fumes inside a vehicle can be dangerous and should be investigated immediately.
Check doors, the bonnet and the boot
Make sure they open, close and latch securely. A bonnet that does not latch correctly is an obvious safety risk.
Check dashboard warning lights
When you switch the ignition on, many warning lights should briefly illuminate as the systems perform a self-check. Once the engine starts, most should turn off.
A warning lamp that remains on may indicate a fault requiring diagnosis. Do not remove a bulb, cover the warning or clear fault codes merely to get through an inspection. The underlying issue needs to be identified.
What Happens if Your Vehicle Fails Its WoF?
If your vehicle does not pass, the inspector should provide a list of the items requiring attention.
A common misunderstanding is that failing a WoF automatically gives the driver 28 days to continue using the vehicle normally. It does not. The 28-day recheck period relates to the inspection and recheck process; it is not general permission to drive an unsafe or non-compliant vehicle.
Where a vehicle is presented for reinspection after the applicable 28-day period has passed, a new inspection and fee are required. Recheck arrangements can also depend on returning to the same inspecting organisation, so confirm the details shown on your inspection sheet.
The vehicle may generally be driven for the purpose of taking it for repair or bringing it into compliance, provided it is safe to do so. If the fault makes the vehicle unsafe — such as a serious brake, tyre, steering or structural problem — it should not be driven. Arrange mobile assistance, towing or another safe solution.
A WoF Is a Minimum Safety Check, Not a Full Mechanical Inspection
One of the most important things for New Zealand motorists to understand is that a WoF is not the same as a vehicle service or comprehensive mechanical inspection.
A WoF focuses on whether specified safety components meet the required standard at the time of inspection. It does not necessarily tell you:
- When the engine oil was last changed
- Whether the cooling system is due for maintenance
- How much life remains in every mechanical component
- Whether the transmission is healthy
- Whether the battery is approaching failure
- Whether the vehicle has been serviced according to schedule
- Whether an intermittent engine problem is developing
A car can therefore have a current WoF and still require servicing or mechanical repair.
Similarly, passing today does not guarantee that a component will remain satisfactory for the entire WoF period. A tyre, brake component or wiper blade may be close to the end of its usable life even if it meets the minimum requirement on inspection day.
Regular maintenance between WoF inspections remains essential.
Frequently Asked Questions
Can I get a WoF before the current one expires?
Yes. You do not have to wait until the final day. Booking ahead gives you time to deal with any repairs without placing yourself under unnecessary pressure.
Because WoF rules and inspection frequencies can change, check current NZTA guidance or ask your inspection provider how the issue date may affect your new expiry date.
Is a pre-WoF check the same as the official WoF?
No. A pre-WoF check can identify visible or mechanical issues that may need attention, but only an authorised vehicle inspector can conduct the official inspection and issue the WoF.
Will a warning light cause a WoF failure?
It depends on the light, the vehicle and the system involved. A warning may indicate a fault affecting a safety system or another inspected component.
Rather than guessing, have the fault scanned and diagnosed before the inspection.
Can I drive after failing a WoF?
A failed inspection does not provide a blanket 28-day permission to use the vehicle normally. The vehicle must be brought into compliance, and it should not be driven when the identified problem makes it unsafe.
Can Sonic On-Site Solutions issue the WoF?
Unless Sonic is operating as an authorised WoF inspection provider, the answer should be no. However, Sonic can inspect the vehicle beforehand, identify likely problem areas and complete many of the repairs required before the official inspection or recheck.
This distinction should be made clear so customers understand that a pre-WoF check is not the official WoF inspection.
Prepare Before the Inspection, Not After the Failure
You cannot guarantee that a vehicle will pass its WoF by completing a few checks at home. Inspectors assess components and areas that may require equipment, training and access beneath the vehicle.
However, checking the lights, tyres, windscreen, wipers, seatbelts, brakes and general vehicle condition gives you a much better chance of finding obvious problems before the appointment.
More importantly, these checks may help you identify a genuine safety issue before it causes a breakdown or contributes to a crash.
Do not wait for your WoF inspection to tell you that something feels wrong. If your vehicle is making an unusual noise, displaying a warning light, pulling while braking or simply does not feel right, have it assessed.
Need Help Getting Your Vehicle Ready for Its WoF?
Sonic On-Site Solutions can carry out a convenient pre-WoF vehicle check at your home or workplace and help identify issues that may need attention before the official inspection.
- Pre-WoF checks
- Vehicle diagnostics
- Battery and starting-system checks
- Brake inspections and repairs
- Servicing and general maintenance
- Selected suspension and mechanical repairs
- Rust assessment, treatment and prevention
- Warning-light investigation
A pre-WoF check does not guarantee that a vehicle will pass and does not replace the official inspection performed by an authorised WoF inspector. Vehicle requirements may vary according to the vehicle's age, design, condition and modifications.